Monday 20 May 2013

How to Make a Titanium Watch Look New

Titanium is a favorite material for wrist watches because it is durable (30 percent stronger than steel), light (50 percent lighter than steel) and abundant (the 9th most abundant element on earth). This is not to say that over time,however, a titanium watch won't become blemished with various nicks and scratches. This is simply the natural wear and tear that your titanium watch will likely endure. If your watch is left looking old and worn, don't fret. You can make your watch look brand new again with very little effort on your part. Does this Spark an idea?

Lay a soft cloth on a level work surface, and lay the watch down flat on the cloth. Shake the refinishing pen up and down a few times, and remove the cap. Place the tip of the pen on one of the scratches of the watch. Press the pen gently on the scratch, and move the tip across the scratch several times. Continue this process for every scratch you wish to remove.

Allow 20 minutes for the watch to dry.

Apply a dab of toothpaste (1/3 of a dime) to a soft-bristle toothbrush. Add a drop of water to the toothbrush, just enough to make it damp. Place the toothbrush bristles on the titanium, and gently scrub the material in a slow, circular motion, covering all the titanium on the watch. The toothpaste will act like a polish to remove the dirt and grime from the watch.

Allow a few minutes for the active ingredients in the toothpaste to work through the dirt.

Take the watch in one hand, and the soft cloth in the other. Firmly wipe the watch with the cloth until you have removed all of the excess toothpaste. Bend the bands of the watch so that you can remove any toothpaste that might be stuck in between the links of the wrist bands. Continue this process until the watch is completely dry.

How to Wear Graduation Cords

Not only can all of the commotion surrounding graduation day be confusing, the protocol around the attire you are expected to wear can be confusing as well. Depending on your grades or the organizations and clubs you participated in while in school, you might be given graduation cords to wear with your cap and gown. Graduation cords are long, thin ropes, usually constructed of a nylon fiber that identify you as having a special status. Wearing them on graduation day is a way of proudly displaying that status. Does this Spark an idea?

Put on your graduation gown to specification.

Take the graduation cords out of their packaging and drape them over your neck and across your shoulders. If your gown has a collar, tuck the graduation cords underneath the collar of your gown.

Look in the mirror and check your graduation cords to make sure that they fall evenly on both sides down the outside of your gown.

Pin the cords in place with a safety pin in the back at right below the neckline or underneath your hood to ensure that the cords do not slip out of place or fall off.

Tips

- Check to make sure that your cords you received are the correct color for your graduation designation before you take them out of the package. If the cords are not the correct color, you can return them if the package is unopened.

How to Make a Flat Nose Look Prominent

Almost everyone has a feature they aren't entirely happy with. However, facial features can be accentuated or obscured with a few cosmetic tricks. If you believe your nose is too flat and doesn't stand out enough, use makeup to create the illusion of a longer, more prominent nose. Does this Spark an idea?

Apply a foundation in a shade close to your natural skin tone to your nose with your fingers or an applicator sponge.

Apply foundation a shade or two darker than your natural skin tone to the sides of your nose. This will accentuate the contours of your nose, making it appear longer, according to EZ make-up.com.

Using your fingers or a makeup brush, gently blend the foundation on your nose, making sure the line between the darker and lighter colors is not visible.

Apply powder a few shades lighter than your natural skin tone to the center of your nose using a makeup brush. ShoppingLifestyle.com recommends blending the powder until it is smooth to avoid noticeable lines.

Emphasize your cheekbones to draw attention to your nose. Apply flattering blush colors to the apples of your cheeks, according to BecomeGorgeous.com.

Tips

- Become Gorgeous recommends selecting rose-colored blush if you have a warm skin tone, peachy blush if you have a peach skin done and lighter shades for fair skin.

Saturday 18 May 2013

Tricks to Make Your Eyelashes Bigger

The eyes provide definition and personality to the face. Your eyelashes are an accessory to your eyes and can be played up to make them look bigger. By using proper makeup application techniques and other tricks, you can achieve beautiful, full eyelashes. Does this Spark an idea?

Eye Makeup Application

To make the eyelashes bigger, you need to create an alluring look from the eyes as a whole. When choosing eyeshadows, select three (or more) different shades from one or multiple color families. Choose a pale color for a base, a medium color for more definition, and a dark color for contrast (or for a "smoky" look). Buy an eyeliner pencil in black or brown, too---eyeliner is a great tool for making the eyelashes look longer. Apply eyeliner as close to the lash line of your upper lids without irritating the eyes (eyeliner should only be applied on the top lid because lining the entire eye can create a small look). Another trick to open up the eye and create a bigger eyelash look is to apply white eyeliner to the inner corner of your eyes.

Strategic eyeshadow application also will contribute to a bigger eyelash look. Begin by applying the lightest eyeshadow color on the inner corner of your eyes (if you did not use the white eyeliner) or over the entire lid. Experiment with applying the medium eyeshadow color on the brow bone and slightly above and below it. For some people, this look works perfectly; for others, blending the darker eyeshadow into the crease is more effective for a dramatic look. Decide for yourself.

Eyelash Curling

Next, use a eyelash curler (never use the curler after applying mascara because it can damage your lashes and cause some of them to fall out). Squeeze the curler as close to the roots, holding the tool in place for at least ten seconds. Repeat the process, work your way up the lashes to the tips. Next, dust loose powder over your eyelashes to add volume and help your mascara to stay longer. Finally, apply several coats of a volumizing mascara to achieve the bigger eyelash look you desire.

False Eyelashes Application

For others who want a more dramatic look, false eyelashes work best. Choose a pair that matches
your natural eyelash color as closely as possible. When buying a pair of false eyelashes (they are fairly inexpensive), purchase eyelash glue as well if it does not come with the lashes.

One trick that some women find helpful when using false eyelashes is to apply a thin line of black eyeliner over the upper lid before applying the false lashes. This strategy will help disguise them and give you a well-defined "landing spot." When you're ready to apply the false lashes, squeeze small beads of glue to the false eyelash's lash line, and then spread the glue with your finger across the entire lash line. Allow the glue to dry for a few seconds before applying the false lashes to your natural ones. Starting from the center, push the false eyelash down to the outer corner of your eye, then repeat from center to inner corner. Allow the false eyelash to dry for a minute before attempting to apply the other eye's lash.

How to Lace Up Double-Tongued Converses

Converse’s Chuck Taylor line of sneakers has once again become a popular choice among teens looking to express themselves through the Taylor’s many color combinations. Double tongued Chuck Taylors feature material in two different colors, with each having its own set of eye loops and tongue. One color makes up the top tongue and inner set of eye loops, while the other color is the inner tongue and outer row of eye loops. With two separate sets of eye loops, there are multiple ways to lace your shoes. Does this Spark an idea?

Lace only the inner set of eye loops for a standard look to your shoes. The inner set of eye loops is situated where the eye loops on a single tongue pair of Chuck Taylors are, and when laced alone, will make your shoes appear like a normal pair of two-tone sneakers.

Lace only the outer set of eye loops for a wider look to your lacing. The second set of loops is set wider than laces on most shoes, and, as a result, your laces will cover not just the top of the shoe but also down the sides of the shoe. This lacing may also be looser than an inner lacing.

Lace both sets of eye loops completely to get the most from your double tongue shoes. Try using a different color lace for each set of eye loops. With two different colors, the distinction between the two sets of laces will be distinct.

Use a short lace for lacing the outer lace, and a full-length lace for the inner laces, to combine the double-laced look with tight lacing. The shorter outer lace will allow the shoes to have the double laced look of a fully strung pair of double tongues but will stop below the knot of the shoe, preventing the outer knot from covering the inner knot. You will end up with a pair of knots, with the inner laces knotted above the outer laces.

Mix up the style of your lacing to alter the look further. While standard alternate side lacing can look attractive in its own right, adding one set of laces in a style such as bar lacing, where each lace travels straight across the tongues, instead of diagonally across the tongues, can give your Chuck Taylor double tongues a unique style.

Thursday 16 May 2013

Eye Make-Up Ideas for Prom

The prom is a time of dressing up and dancing the night away with friends. Flowing gowns, high heels, updos and perfect makeup are a must for a girl heading out the door for this magical night in her teenage life. Eye makeup for proms is often bolder and more colorful than that worn on a daily basis. Practicing application prior to the prom is suggested. Does this Spark an idea?

Smoky Gray

Purchase black or charcoal eyeliner and eyeliner in dark, medium and light gray shades. Line the top of your eye from the inner corner of your eye, past the outer edge all the way to the eye socket bone. Using a small brush, apply the darkest shade of gray just above the liner in a thin line. Apply only to the outer edge of the lid, leaving a bit of eyeliner farther out. Using a small fan type brush, apply the medium shade of gray just above the darker shade from the inner corner all the way to the edge of the eyeliner covering the entire lower lid. After applying to each side, lightly brush over the shadow with the brush to blend it with the darker shade just below it. Take a large fan brush and apply the lightest shade of gray to the upper lid area, connecting with the darker shade at the outer edge.
The smoky gray look goes well with black, white or gray dresses. Dresses of odd shades or multiple colors are also matched well with this look.

Match Four

You can choose to match your eyeliner to the color dress you choose. Pick out four complementing shades of the same color. Choose nonmatte varieties. Using a small brush, apply your darkest color along the eyelash line. Using the same brush, apply the next lighter shade to the inner half of the lower lid. Apply the next lighter shade to the outer half of the lower lid. Use the lightest shade to cover the top lid area. Use a fan brush to blend the separating lines between each color.
If you cannot find four shades to match your dress, consider getting a medium or dark gray for your darkest shade, or a very light gray for your upper lid.

Sparkle and Shine

For a super-bold look on the eyes, put some petroleum jelly and glitter to use. Purchase body glitter in the colors of your choice. You may want to mix the colors of your dress in with silver or gold glitter for a truly outrageous look.
Apply a thin layer of petroleum jelly to your upper and lower eyelid. Be cautious not to get the concoction in your eyes, avoiding the inner corner. With a small makeup brush, dip carefully into the glitter and gently shake off the majority of the glitter. Dab the brush gently onto your eyelid beginning on the lower inner lid. Work your way up the lid slowly applying the glitter. Do not attempt to add glitter on top of what you have applied.

Wednesday 15 May 2013

How to Make the Neck Bigger On a Shirt


A simple way to enlarge a neckline on a T-shirt is to cut a slit down the middle of the neck, fold in each corner to form a V, and sew the flaps down with a sewing machine. Create a simple V-neck to widen a shirt neckline with a demonstration from an eco-friendly fashion designer in this free video on making clothes.

Video Transcript

Hi, I'm Tolly Moseley. And I'm Rene Geneva, and you can check us out at EcoChicClothing.com. Sometimes I get two shirts, and they're really too tight around the neck. Well, why don't we go over today making a neckline bigger in a T-shirt. That would be great. OK. The tools that we have for you today are scissors, pins, a measuring tape, and a sewing machine. The first thing we do, is we take our T-shirt. OK. And we decide how much bigger we want it. Would you like it to be V, or would you like it to be all the way around bigger, because it fits you on the shoulders up here. I think I'd like it to be a V. OK. Alright, so what we can do is we can measure. So what we can do is we can measure how far down you want it. So, two inches? Yeah, sure. So the first step you want to do is to pin the shoulder seams together on your T-shirt. And the easiest way to make your neckline bigger, and of course there's many ways to do it, but the way I'm going to show you today is how to make a little V in it. So we marked the two inches down, and now we want to take the center, so I'm going to put a pin in the center of the V, and open it up. Put a mark where the original pin was, because that's how far down you want it. OK. So we mark the middle, and we mark the spot that you want it to go down to, and we are simply going to take the scissors and we are simply going to take the scissors. OK. We're just going to cut down to that mark. Now from here, you can take a piece of binding, or you can simply turn it in and sew. Got it. So, I'm going to take the pin and pin it. Then I will pin the other side. Because this is a V, one of the easier ways to do it is just sew down to the little point, and then sew back up from that point. Alright, so now, you have successfully widened your neck line, and you've made a cute little V in the front. So. Cute. Would you like to try it on? Sure. Looks pretty awesome.

How to Make Your Shoelaces Look Straight

Maybe you want to lace your shoes a different way to add personalization to your footwear, or maybe you suffer from foot problems and want to reduce the pressure that footwear can cause. Whatever the reason is, it's easy to make your shoelaces look straight. Instead of inserting your shoe laces into the eyelets in the traditional zigzag pattern, you just run one across from one eyelet to the next. Does this Spark an idea?

Remove any existing laces that are in the footwear. Reuse the strings or use new ones. As long as they are the proper size for the shoes or boots, they'll work fine.

Start with one shoe or boot. Insert the ends of the shoelaces into the last eyelets in the footwear. Place one end into the left side, and the other end into the right side. The shoelace will be straight across. Adjust the string so it's equal on both sides.

Reach into the shoe or boot and grab the left end of the shoelace. Pull it up inside the footwear. Bring it up and through the first eyelet so it emerges from inside out, according to Ian's Shoelace Site.

Grab the right end of the shoelace from inside the footwear. Insert the end into the eyelet directly above it from the inside. Pull the string out. Then, place it into the eyelet on the left, across from it.

Pull the shoestring down on the inside again. Place the end into the next eyelet on the shoe or boot that's directly above. Continue putting the shoelace in according to steps 3, 4 and 5. Adjust the string every now and then so it's equal on both sides.

Pull the shoelace out of the top eyelet on the right side of the foot wear to complete the task. Adjust the strings one more time, if need be. Now your shoe laces look straight and will be more comfortable on your feet.

Tips

- Straight (bar) lacing works best on shoes or boots that have an even number of eyelet pairs.

How to Make a Pair of Man's Shoes Look Like Woman's Shoes

Finding the perfect fit in a shoe can be difficult. Sometimes finding the best fit for a woman means shopping in the men's section of the shoe department. Once that ideal shoe has been found, however, it may need some dressing up to make it appear more feminine. Simply adding different accessories to the upper part of the shoe can work wonders in making a man's shoe look like a woman's shoe.

Attach a silk flower to a pair of shoe clips using a hot glue gun. Hold the flower by the petals and place a dab of glue to the base of the flower. Press the base of the flower onto the clip. Allow the glue to dry and attach the clip to the ridge of the vamp. Other variations that can be glued include large beads or ribbon bows.

Replace shoelaces on sports shoes with feminine colors, such as lavender or pink. Shoe laces with threads that glitter also appear more girly.

Attach rhinestones to fringe with a hot glue gun. A popular men's style includes leather fringe across the upper part of the shoe. The fringe is about 3-inches across (depending on the foot width) and about 1-inch long. Run a thin line of hot glue down each strand. Use tweezers to hold the rhinestones as you place each rhinestone on the glue.

Tips

- The vamp, or upper, is the part of the shoe that extends from the sole and wraps over the top of the foot.

- Use accessories that are the appropriate size for the shoe. Accessories that are too big or too small will look out of place.

- Purchase shoe clips from the shoe section of a department store or a shoe repair shop. Packages may contain more than one pair of clips and are either gold or silver.

How to Make Yourself Look Skinny Straight Away

We all want to look like we are in our best possible physical condition, while also looking fashionable. If you are interested in making yourself look skinny straight away, it is a simple process. Here are a few key suggestions to follow. Does this Spark an idea?

Purchase clothing that is more flattering to your figure. Avoid tight clothing, which only accentuates imperfections. Jeans are a versatile item that you can dress up or down so begin your shopping looking for dark denim. The bottom of the pants should almost cover your shoe. You do not want the jeans so long that they trip you, but they should almost cover your footwear. The point of wearing jeans long is so that your shape is elongated.

Buy shirts that are longer than normal. If you have big hips, a long shirt will cover the area as opposed to attracting attention to it. Button-down cotton shirts are often flattering. Avoid capped sleeves and sleeveless styles if you have heavy arms. Any woman should opt for solid colors and thin vertical stripes.

Highlight small areas with light or bright shades. Larger areas are easily camouflaged with dark colors or with a head to toe monochromatic look. These suggestions apply to anything in your wardrobe. Avoid bows, big flowers and ruffles in places where you are large. If you have a heavy bust, avoid ruffles near the chest area, which will only enhance.

Accessorize as much as possible without going overboard. Long scarves and wide belts can work for you, and not against you. A long scarf draped along the neck helps to elongate the body. To define a waistline, wear a wide belt over a long shirt.

Remember that no article of clothing should be so tight that it creates a bulge in or over it. In terms of pants, avoid low-rise where any extra bulge around the midriff is prone to hanging over your pants. Shirts should never appear excessively tight where bulges are visible.

Tips

- Only buy clothing that you know will make your body look thinner, because it is flattering.

- If you want to look chic, remember that understated elegance is timeless.

Warning

- Avoid elastic in any garment or items that have too much fabric.

Tuesday 14 May 2013

How to Put an Outfit Together While Wearing Leggings

Leggings can be a modern and versatile fashion choice for women of all sizes and come in a wide variety of colors and patterns. Most leggings are waist-high and come in varying lengths, extending down to the top of the foot, or at the ankle for a capri style or to the mid-calf. There are a few tricks to putting together an outfit with leggings so as to complement your size and style and to look fashionable. Does this Spark an idea?

Pick leggings that fit you and that are not too tight. Leggings that are too tight are uncomfortable and may make you look bigger than you actually are. Dark colors will be more slimming, while brighter colors can make legs look longer. Choose the length that looks best on your legs; a mid-calf style can make wide legs look even broader.

Choose a tunic-length top that is at least long enough to cover your rear end. Tunics that hit at the top of the thigh or mid-thigh are a good length with leggings. In addition, since leggings are so close-fitting, choose a loose-fitting top to balance out the overall look. Top everything with a blazer to add a chic, polished touch to your outfit.

Wear leggings under shorter skirts and dresses. Leggings worn with skirts and dresses at the knee level or longer will create a dowdy look.

Pick shoes that complement your desired look. High heels or boots will look more polished and trendy, while a flat shoe will look casual and relaxed.

Try a belt with your top, especially with longer tunic-style tops. This helps define your figure by accentuating your waistline.

Remember that leggings are not pants and should not be worn as such. Wear a dress or a skirt over your leggings if you aren't comfortable with just wearing a long top. Think of leggings as an accessory to your overall outfit, not the central piece.

How to Adjust Andis Trimmers

The Andis outliner uses includ outlining hair and clipping edges. Adjust clippers when they become dull and do not cut well. You can adjust clippers to any hair length and can adjust them to be very sharp. Too much adjustment can cause the outliner to become too sharp and can cut people. Adjustments are done precisely to prevent injuries and ensure the best quality. Does this Spark an idea?

Loosen the two screws with the Philips screwdriver located on the back of the blade. Two screws hold the blades together. Do not loosen the screws all the way or take them out.

Line the blades equally on top on each other but do not overlap the blades. This will allow for the sharpest cut.

Tighten the screws and look at the blade from a sideways angle to make sure none of the blades is overlapping.

Hold the blade up to the trimmers with a little pressure. Screw the blade back to the outliner.

Monday 13 May 2013

How to Apply Eyeshadow to Make Eyes Look Bigger

It's not just the color of eye shadow that helps your eyes look bigger, it's also the application. By following a few simple tips on how to apply eye shadow, you can achieve the look of bigger, brighter eyes. Does this Spark an idea?

Prep your eyes for color. Tweeze your eyebrows to create a thinner, more defined shape. By tweezing, you will create more room to apply the eye shadow and allow your eyes to stand out more than your eyebrows. Before applying eye shadow, dust face powder over the eyelid using whatever you use for applying your face powder (preferably a brush). This helps prevent a crease from forming by adding a layer between the oil in your skin and the eye shadow.

Apply a neutral color eye shadow. Start at the inner corner of your eyelid, using the full eye shadow brush to apply the eye shadow evenly over the entire eyelid below the crease, the line that forms at the top of your eyelid when your eye opens.

Apply a medium to darker eye shadow evenly along the crease of the eyelid, and slightly above the crease. After wiping the brush clean with a dry towel, use it to lightly blend the darker eyeshadow in with the lighter shadow where the two colors meet (the crease).

Add a very light, white or off-white shimmer eyeshadow to help your eyes really stand out. After wiping the eye shadow brush clean with a dry towel, apply the light shimmer under the brow line. Use a small, thin eye shadow brush to apply the light-shimmer eye shadow carefully under the eye, just below the bottom lashes--similar to applying eyeliner.

Tips

- To create the illusion of longer, thicker lashes--which also helps your eyes look bigger--apply a dark eye shadow near the roots of your eyelashes after applying mascara and eyeliner.

How to Apply Female Vampire Eye Make Up

Vampire books, movies and TV shows are as popular as ever, and makeup looks from such media have also become part of popular culture. Smoky, smudged eyes combined with very pale skin and blood-red lips and nails constitute the traditional vampiress, or female vampire, look. Achieving vampiress eyes requires a lot of mascara, black eyeliner and black or deep purple eyeshadow. Wear vampiress makeup for a Halloween or costume party, or simply for a sexy evening look. Does this Spark an idea?

Prep eyes by first applying concealer and powder to your lids. This helps eye makeup stay put as opposed to creasing from excess facial oils. Pat on concealer with your finger; then follow with a sweep of powder using either your finger or an eyeshadow brush. Blend well and brush away any loose powder that has fallen onto your eyelashes or cheeks.

Line lids with black liquid eyeliner. Liner can be used to make a "cat's eye" look. Use pencil black eyeliner below the bottom eyelashes and smudge. If you cannot master the tricky liquid eyeliner look, simply use the pencil eyeliner all the way around the eyes and smudge, creating a smoky eye look. Smudge eyeshadow with either your fingertip or a wet eyeshadow sponge brush.

Curl top lashes with an eyelash curler and heavily apply black mascara after the eyeliner has dried. Apply mascara heavily to bottom lashes as well. Fake eyelashes can been added for extra dramatic effect.

Cover lids with a black or deep purple eyeshadow using an eyeshadow brush. Make sure the eyeshadow covers the entire lid and blend well.

Tips

- Complete your vampiress look by applying blood-red lipstick and foundation about a shade lighter than your natural skin tone.

- Keep lashes separated by applying one or two coats of mascara, allow to dry, and then build on the dried mascara. It is often a good idea to use mascara that comes with a primer for easy separation of the lashes. This will result in less clumping.

- Skip the bronzer or blush and paint nails with deep red or black nail polish.

- Individual fangs can be purchased at Halloween or costume stores.

Warning

- If you have sensitive skin, read all makeup product labels first to prevent allergy flare-ups. It is always a good idea to test makeup on your forearm and allowing it to sit for 15 to 20 minutes to check for allergic reactions.

Sunday 12 May 2013

The Best Way to Make Eyes Look Wide Awake with Eyeliner

Eyeliner is a magical tool created to define and beautify eyes. Applied correctly, eyeliner can make eyes look larger, wider and more awake. Choosing the right color and type of eyeliner is vital to avoid looking like a panda or like you have a black eye. Highlighting smaller or wearier eyes with eyeliner can transform your face from tired to bright and awake. Once you know how to make your eyes look wider and more awake with eyeliner, you'll wonder how you lived without it. Does this Spark an idea?

Sharpen your eyeliner pencil before application for the best results. A blunt pencil creates a messy line rather than a steady, neat one.

Close your eye and hold it shut gently with your pointer finger.

Apply a fine line of eyeliner as close to your lash line as possible. Experiment with different colors until you find the one that makes you look the most alert. Light- to medium-colored eyeliners usually work best for awakening tired eyes.

Fix any mistakes with a cotton bud dipped in eye makeup remover.

Use light-colored or shimmery eyeliner in the corner of your eyes closest to your nose to make them appear even wider.

Tips

- Use a light colored eye shadow as a base and smudge a darker or brighter color on the outer corner of your eyelids.

Warning

- Be careful not to poke yourself in the eye when using a sharp eyeliner pencil.

How to Wear a Speedo

According to the Huffington Post, men’s Speedos are making a comeback on the runways in Milan. The revealing swimwear is typically embarrassing for men to wear, but with the right attitude and a high level of confidence, any man can wear a Speedo. Does this Spark an idea?

Wear a stylish Speedo to increase your confidence. Many times, if you believe that you look good, others will believe it too. Buy a Speedo that makes you feel comfortable and stylish.

Walk with your head held high. It is important to walk confidently on the beach, at the pool or wherever you decide to wear your Speedo. Of course people might stare, but think positively about the extra attention and keep your head up.

Continue to have a great time in your Speedo. Don’t let others around you affect how you feel. If you have decided to wear a Speedo, it is very important to still have a good time, no matter what others might say about your decision.

Tips

- Buy a Speedo that fits your body type and size to maximize comfort and style.

How to Make Your Fingernails Look White Under the Underside of Your Nails

Well-manicured hands help to make women look well groomed and professional. Keeping the underside of your nails white is part of the process of having manicured hands. Some people have trouble making their nails look white due to yellowing of the nails, brittle nails and other issues. Creating the illusion that the underside of your nails are white is not difficult and gives your nails a polished look. Does this Spark an idea?

Fill a small bowl with warm water and soap. Soak your hand in the small bowl of warm water for 10 to 15 minutes. This will let any dirt or particles on your hands soften up so that you can get it off your nails easier.

Clean your nails with a soft and clean nailbrush. Use the nailbrush to remove any dirt or buildup that makes your nails look discolored. Scrub under each nail and over the nails with a nailbrush.

Mix a teaspoon each of lemon juice and baking soda into another bowl. Dip your nailbrush into the mixture and scrub your nails with it. This helps whiten both sides of your nails. Scrub the top of your nails and underneath your nails. According to the Women Junction website, this is a good way to make your nails look whiter.

Wash your hands to get rid of the mixture. Dry your hands with a towel and inspect your hands to make sure that they are completely clean. Having clean hands adds to the illusion of making the underside of your nails look whiter.

Use a nail file and clean the underside of your nails with the nail file. Complete this task by using the tip of the nail file and scraping under the nail to try to get any remaining dirt out. This helps make the undersides of your nails look whiter.

Apply clear nail polish to your nails and let the polish dry. This protects your nails and gives them a manicured appearance. Use a French manicure pen and color the tips of your nails white. This creates the illusion of having nice white nails and even makes the undersides of your nails look whiter.

Saturday 11 May 2013

How Can I Make Myself Look Better in Eviction Court?

What does your outward appearance say about you? When you must appear in eviction court, or any court, put your best foot forward to make the best possible impression. Your overall appearance makes a statement to the judge. Anything you can do to help yourself gain points in your favor will certainly help your case. You don't have to go out and buy an expensive outfit to accomplish this goal. Does this Spark an idea?

Clothing

Prepare for court by dressing cleanly, as if you were going to a business meeting. Don't try to dress in shabby, old or dirty clothes to give the message you can't pay your rent. This tactic usually will work against you. Wear clothes that will help you blend in.

Wear colors that are power colors for you and also reflect respect to the court. For example, if you are a female, keep the colors neutral. The color red is not recommended, as it draws too much attention and is considered a sexual color.

Wear shoes that are comfortable and quiet. Wearing noisy boots or high heels are distracting. Clean your shoes ahead of time to make sure no scuff marks are on them.

Wear blouses that have full-coverage. Low-cut blouses have no place in the courtroom. The cleavage won't gain you points. It will actually work against you.

Leave the floral print patterns at home, men. Wear nice khaki pants, a belt and a button-up shirt. That's fine if you don't have a tie. If you do have a tie, wear one. You aren't required to wear a suit, but at least dress up a bit for the judge. Please, leave your favorite shirt from Waikiki in the closet.

Hair

Wear your hair swept off the face if you are a woman. If your hair is long and straight, it is best to wear it curly. Traditionally, men feel more protective of women with curly hair. Refrain from wearing it tight and in a severe updo that might make your features look stern. Wearing an updo is fine, but keep it loose with some curly tendrils hanging down for a softer appeal.

Shave the beard or mustache if you are a man. Statistics state men come across as more honest without facial hair. If you are planning to go to eviction court and want points with the judge, definitely get out the razor and get rid of the facial hair.

Get a haircut and go to court with clean, freshly trimmed hair.

Face and Body

Leave any jewelry except for any minor, small earring studs, behind. Don't wear big hoops, long dangling earrings, or big, flashy, studded earrings that distract the judge's attention. Don't show up in court wearing a lot of jewelry or any body jewelry.

Tweeze your eyebrows. Giving your eyebrows clean, smooth lines will give your eyes a smooth frame. This can change the entire look of your face. If you don't know how to trim your eyebrows, go to a salon and have them tweezed or waxed professionally for around $10.

Brush your teeth before going to court with a tooth-whitening toothpaste.

Wear makeup sparingly. The natural look is better for women. Refrain from wearing colors in your makeup that are not natural colors for your face, such as purple, green or blue eyeshadow or red lipstick. Use clear lip gloss and neutral shades for eyeshadow.

Smile and nod. Using good facial expressions will help you look better in eviction court. Don't be afraid to look the judge in the eye. When you catch the judge's eye when she is speaking, nod immediately to show you are paying attention.

Friday 10 May 2013

How to Make Up Looks for School

When it comes to your style at school, switching it up as much as possible can keep you looking fresh and put together at all times. Making up looks for school isn't nearly as scary as it sounds, especially if you know how to use the same accessories in different ways or have a few different options for styling your hair. By using a few simple tricks and tips, you can come up with all sorts of school looks even if you are on a limited budget. Does this Spark an idea?

Lay out your outfit the night before school so you have time to try things on and switch things around to create the perfect match. Don't forget to lay out accessories as well.

Practice multiple hairstyles on yourself as much as possible so you can easily create any look you want to go with your outfit of the day. Try not to wear the same hairstyle more than three times a week.

Use your existing accessories in different ways to create new looks--for example, try wearing the belt that you usually put over jeans on your hips over a dress around your waist. Scarves can also be used for many different things, including as hair accessories, around the neck or as belts.

Go back and forth between using light, fresh makeup looks to trying out darker, punkier or more bold looks. Experiment with different lip colors of all shades for a dramatic change.

Types of Eye Frames

Any pair of prescription glasses will improve your vision, but a great set of eye frames makes you look good, too. Selecting your eye frames is a matter of weighing your style, your personality and the shape of your face. With so many stylish frames available, the fashion-conscious no longer need to worry about contact lenses. Does this Spark an idea?

Wire Frames

Wire frame glasses are available in most shapes and from many designers. These no-nonsense frames are down to earth and, when chosen properly, project a style that says their wearer is concerned with style, but not obsessed with it. Although wire-frame rims are typically lighter than those made out of plastics, they're also apt to break more easily, so eyeglass wearers with an active lifestyle may want to consider a different type of frame.

Plastic Frames

Plastic frames don't just hold lenses in front of your eyes. They also make a bold fashion statement. Whether heavyset frames are used to call attention to your eyes or craft a bookish sensibility, heavy framed glasses are as much a fashion accessory as a necessity for vision. Modern polymers make plastic frames more lightweight than they were decades ago, and the sturdy construction of heavier frames makes them a durable eyewear choice.

Oval Frames

Classic oval frames can be used to soften the contours of an angular face or to accentuate high cheekbones. Although oblong frames are fashionable, oval frames are available in a variety of shapes and sizes that make this shape fit many face shapes.

Rectangular Frames

Eyeglass wearers with round faces may opt for rectangular frames to benefit from a slimming effect that comes from wearing frames that are horizontally oriented. Rectangular frames also add angles to round faces, helping de-emphasize weak cheekbones and jaw lines.

Butterfly and Cat-Eye Frames

Butterfly frames feature lenses that flare slightly to the outside of the face, with narrower sections by the nose than at the temples. Cat-eye frames take this construction farther, bringing the frame to an emphasized point at the temples. Cat-eye glasses may work well with round faces, as they weigh the upper part of the face heavier than the lower half, and slide onto an oval face with ease. Butterfly glasses may provide some oblique angles to a square face or to help balance out a narrow chin.

How to Make Your Nose Look Smaller in Photos

If you are bothered by the size of your nose in photos and wish it appeared smaller, you can accomplish this with a few simple tricks. Contouring and highlighting the nose with makeup and changing the position of your head can greatly reduce the appearance of a large nose in photos. Does this Spark an idea?

Purchase a cream foundation or concealer that is one shade darker than your natural skin color and another that is one shade lighter and contains light-reflecting pigments.

Apply the darker foundation with a concealer brush to the sides of the nose if you wish to slim it. To shorten the nose, apply the foundation to the tip. To straighten a crooked nose, apply straight lines down the sides. Blend the color into your skin.

Apply the lighter foundation in a strip down the center of your nose. According to Nose Cosmetic, this renders the impression of a slimmer nose. Blend the color into your skin.

Set the makeup with powder so it does not smudge.

Position your head to create the illusion of a smaller nose. According to The Beauty Bunny, tilting your head back slightly can make your nose appear smaller in photos.

Thursday 9 May 2013

How to Make Up Eye Stencils

Have the perfectly made-up eye by making ordinary make-up applications look extraordinary. Free-handing perfect eye makeup takes a practiced hand. Eye stencils allows eye makeup to be applied artistically with little talent needed. For model-perfect eyes, create eye stencils out of low-cost items and enjoy a high-dollar appearance. Does this Spark an idea?

Lay the sketch paper on the life-size photo of the face. Trace the shape of the eyes on the sketch paper. Cut the traced area out using the craft knife.

Lay the sketch paper on the heavier watercolor paper and trace the eye shapes on the watercolor paper. Sketch the desired design on and around the eye shapes. Cut out the sketched designs using the craft knife. Trim the excess paper from around the newly created eye stencils.

Lay the stencil against the face with the traced eye area over the actual eye. Use an eye pencil to trace the design on the eye. Fill in the design with eye shadows and pencils. Experiment with colors to create different looks.

Do Contact Lenses Make Pupils Bigger?

Prescription contact lenses do not make the pupil of the eye appear larger. However, there is a growing trend of women wearing circle contact lenses, which make the eyes appear large and childlike in appearance. Does this Spark an idea?

Circle Contact Lenses

Contact lenses sold without a prescription is illegal under U.S. law, but women in America and overseas are clamoring for circle contact lenses. Circle contacts make eyes appear larger than they are, with an almost doe-like, anime look. The large-eye look has been popularized by many Asian women in South Korea, Japan, Singapore and other countries. According to The New York Times, the look created by wearing circle contacts is known as Ulzzang in Korea, which is short for "best face" or "pretty."

Eye Risks

Many optometrists have voiced concern that the cosmetic circular contact lenses are risky. Circle contacts are not as permeable as standard prescription contacts, so enough oxygen may not reach the eyes. Circle contacts may scratch the eyes' surface due to improper fit and lead to bacterial infection. Swelling, allergic reaction and possible temporary or permanent sight loss are also possible risks of circle contacts, according to CNN.

Addictive Trend

Circle contacts have become a growing trend in the United States and across the world. The lenses cost around $20 to $30 a pair, and women worldwide share tips online on where they can purchase them illegally. Many everyday wearers of circle contact lenses see them as harmless, comparing popping in the lenses to wearing mascara or eyeliner.

Wednesday 8 May 2013

Eye Make-Up Tips

Whether you want to enhance your beautiful brown eyes or make your bright blue eyes pop, eye makeup is key to drawing out your personal beauty. Every eye color and shape can shine with the proper makeup application and knowledge. Professional tips make alluring eyes attainable, and everyday makeup a cinch. Does this Spark an idea?

Invest in the Right Tools

A painter must have a set of proper paintbrushes to create beautiful works of art. Makeup artists rely on an arsenal of brushes to achieve a rainbow of looks. Brushes make application more precise, and blending more seamless. For most, as few as two makeup brushes are needed: a small, dense brush for applying your darker accent colors, and a bigger, fluffy brush for blending the colors. There are dozens of brush shapes and sizes, but these two are key to just about every makeup look.

Apply Primer

Before applying color to your eyes, always start with a primer. Most major cosmetics brands offer their own eye shadow primer. The purpose of this creamy product is, first, to provide a sticky surface for the shadow to adhere. Second, primers make your eye shadow last longer and stay truer to color. If you'd rather not invest in another cosmetic product, you can use cream liners or shadows to do the job of priming lids. Simply swipe a neutral-colored cream product over your lid to achieve the same results. Also, if you want to enhance bright colors, try using a white liner, cream shadow, or primer. For dramatically dark eye looks, choose a black or gunmetal gray primer.

Line Your Eyes

Eyeliner frames the eyes and provides contrast for eyes to pop and sparkle. According to professional makeup artist Carmindy, a good technique is to "add dark liner to the upper lash line of the eyes. You can use a pencil, shadow, or liquid depending your desired effect. The closer to the lash line, the more natural the effect." As for the lower lash line, a great tip for making eyes look refreshed and bright is to line the water line with white or flesh-toned eye liner. Your lower water line can be revealed by pressing gently into your under-eye. Simply line the area just inside the lower lash line for a fresh look.

Highlight the Brow Bone

The finishing touch for every makeup look is the highlight. Professional makeup artist Carmindy shares these valuable tips: "Always apply a highlight shade under the eyebrow and in the tear duct area. This creates an open, bright-eyed look. Younger women can choose shadows or creams with shimmer; older women should stick with sheer, matte colors like vanilla. Highlight shades include: light pink, white, vanilla, gold, iridescent, and champagne."

Ways to Make a Nose Look Smaller

If the size of your nose makes you feel uncomfortable, you can alter its appearance slightly with a few beauty tricks. While plastic surgery is the only option to change the size of your nose permanently, you can make your nose appear smaller by applying shading techniques, wearing a flattering hairstyle and enhancing your eye makeup. Does this Spark an idea?

Apply Mascara and Eye Makeup

Play up your eyes with mascara and bold eye makeup to divert attention away from the nose. A bold swipe of eyeliner gives your eyes depth and definition. Sweep a soft black or kohl eyeliner pencil along your upper eyelid. Boost your eyes and downplay your nose with a double coat of mascara. To get the look of false eyelashes, sweep the mascara from underneath the lashes. Then close your lashes and brush the wand down over the top. Repeat this step twice to complete the look

Use Foundation and Bronzing Powder

To make your nose look smaller, apply contouring and highlighting techniques to your face. Apply bronzing powder to your chin to make it look more prominent. Stroke a small swipe of bronzing powder on the center of your chin and outward in both directions. Blend the powder with a dry sponge. Set the powder with face powder.

Contour your face with powder. After applying liquid foundation to your face, set the foundation with a translucent powder. Apply a darker shade of powder or bronzer on the bridge of the nose. To minimize a too wide nose, Nose Cosmetics recommends you "draw straight lines on the outer corner of the nose that start from the eyebrows and finish at the end at the tip of the nose." To shorten a long nose, apply bronzer to the tip of the nose to make it appear shorter.

Change Your Hairstyle

ILoveIndia.com recommends that you "avoid slicking your hair back, in an attempt to make your nose look smaller." Instead of a straight, long hairstyle, wear a hairstyle with longer layers that frame the face. Avoid side-swept bangs and other hairstyles that cover your forehead with hair; these styles bring more attention to your nose.

Fat Burning Exercises for Women at Home

Many women will say that they simply don't have time to work out. But, since everyone spends at least a few hours at home each day, you can incorporate even small spurts of exercise into some part of your daily routine that will make you feel and look better. These exercises are perfect for women who would like to burn fat but don't have hours to devote to a workout. Does this Spark an idea?

Jumping Rope

Jumping rope may be one of the most affordable and most beneficial workouts. All you need is a jump rope and some cross-trainers. According to Parade Magazine, this cross-training exercise is especially good for women because it burns lots of calories and helps strengthen the bones in a woman's lower body. It also tones the legs, back, glutes, shoulders, abs, chest and arms. Jumping rope can be a good low-impact alternative to running or jogging, which is especially attractive for those who hate running or who have injured themselves.

Parade recommends jumping only high enough to clear the rope, which is about 1 inch off the ground, and landing lightly on the balls of your feet. Keep your torso upright, look straight ahead and keep your elbows as close to your side as you can, making small circles with your wrists as the rope goes around and around. Work your way up to 10-minute jump-roping sessions.

Using a Step

A step is a 12-inch tall block that is used in exercise routines. Place your hands on the step, shoulder-width apart and get into a push-up position. Your body should make a straight line from shoulders to ankles; keep your back and butt flat. Bring your right foot up to the step and keep your left leg and thigh straight and parallel to the floor. Jump, switch legs and land. Hop to switch legs for one minute.

Fencing Lunges

According to Women's Health Magazine, this exercise mirrors fencing poses. Stand up straight holding a pair of 5- to 10-pound weights, one in each hand. Make a strong lunge forward with your left foot, extending your left arm straight out as if you were thrusting a sword. Keep your right hand on your hip. Come back to the center and repeat, this time to the left, with your foot turned and pointed outward. Keep your right hand on your hip. These two positions are one repetition. Repeat this eight to 10 times then switch to the other side.

Tricks to Make Your Nose Look Smaller

A large nose can be a source of insecurity for both men and women, but can be temporarily solved by using tricks used by makeup artists around the world. These tips are an alternative to expensive cosmetic surgery and cost very little to implement in comparison. There are several ways to fix the different types of large noses. Does this Spark an idea?

Wide Nose

For a wide nose use a shade of foundation that is darker than your natural skin tone and blend it at the sides of the nose. The lines should be well blended and begin at the eyebrows, ending at the tip, according to Nose Cosmetic. Some makeup artists suggest using a bright highlighter along the bridge of the nose for extra definition.

Long Nose

If you are self conscious about your nose being too long, you can create the illusion of a shorter nose by taking a creamy foundation or concealer in a darker shade and applying it to the tip of the nose. Use your fingers or a sponge applicator to apply the foundation.

Crooked Nose

To improve the appearance of a crooked nose, apply a darker foundation on the crooked side and a lighter shade on the opposite side. Bella Sugar says to keep the lines as straight as possible. A light highlighter applied along the length of the nose will disguise bumps and crookedness.

Tuesday 7 May 2013

What Is a Kohl Pencil?

The kohl pencil's roots go back to ancient times when thousands of years ago Egyptians mixed a paste of lead sulfide or antimony sulfide to use around their eyes. Pencils made of the substance provide a more convenient way for modern women to use this dark-colored cosmetic. Does this Spark an idea?

History

Kohl was used from 4000 B.C.E. by royalty and both men and women commoners in Egypt to guard against eye disease, protect eyes from the sun and ward off evil spirits, reports Smith College Museum of Ancient Inventions. They also used it to make their eyes look bigger, a precursor to the kohl pencil's common cosmetic use today.

Identification

Kohl pencils are used to line the eyes; the kohl usually lines the lower lid of the eye, under the lashes, and sometimes is used to line the upper lash line as well. The look is often termed "smoky" when describing the makeup's style.

Expert Insight

Fashion editors consider the look created by kohl pencils dramatic and mysterious. Allusions to Cleopatra and Kate Moss are often made when a woman is sporting this smudged, heavy kohl look on her eyes.

Fun Fact

Two popular culture appearances of kohl are when U2 includes it in the song, "Miss Sarajevo," by asking, "Is there a time for kohl and lipstick?" and when Captain Jack Sparrow of the Pirates of the Caribbean films heavily outlines his eyes in it in each film.

How to Make Vintage Tees

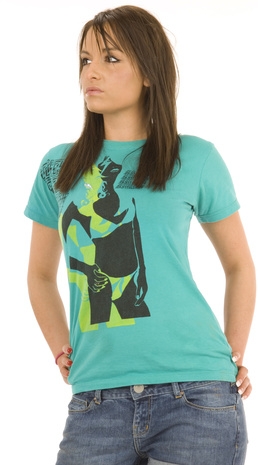
Shopping in a second-hand store for vintage tee shirts leaves your options up to fate and shirts from boutiques come with high prices. Creating your own vintage-style tee lets you choose the exact color and image you want without spending a lot of money. A new shirt may also handle normal wear-and-tear better than one with some miles on it. Does this Spark an idea?

Iron-Ons

Wash the shirt. Do not use fabric softener; it prevents the ink from adhering to the fabric.

Find a vintage image online, upload one from a digital camera, or scan one onto your computer. Old signs, newspaper or magazine pages, celebrity portraits (including mugshots) and movie stills make eye-catching designs. You can also download a free vintage-looking font and use it with word-processing software to type old quotes or catchphrases.

Increase the contrast or color saturation with imaging software. Bold, simple graphics work best on tees. If your software has a half-tone contrast filter, experiment with it to create a fuzzy, dotted image reminiscent of old newspaper prints.

Enlarge the image to 8 1/2 inches by 11 inches. If you can separate the design into two or more parts, you can use multiple transfer pages, therefore creating a larger image on the tee.

Print the image onto the transfer paper according to the package directions. If you print on transfer paper meant for light-colored fabrics, you need to reverse the image before you print. Transfer paper meant for dark fabrics usually does not require reversal.

Cut out the image and lay it face-down on the shirt. Set the iron on the highest setting.

Run the iron over the paper, pressing firmly. Work in small areas at a time, starting at one of the corners. Refer to transfer package directions to determine how long to hold the iron in one place.

Let the paper cool. Peel off a tiny corner of the backing paper to check the transfer. Slowly remove the rest of the paper.

Stenciling

Wash the shirt without fabric softener.

Refer to the second step of Section 1 to create a vintage image. For a stencil the image needs to be the highest contrast possible. The image is easier to cut if you break down the image into simple shapes.

Print the image onto the transparency sheet. Let the paper dry completely before removing it from the printer.

Outline the stencil shapes with a permanent marker.

Use the craft knife to cut the shapes from the transparency sheet.

Lay the tee on a flat surface and slide a piece of cardboard inside. Position the transparency and tape it in place.

Dab a small amount of paint on your sponge and test it on a paper towel before applying. Gently sponge the paint over the stencil; this keeps the edges from smudging or creeping underneath the stencil. To create darker or more intense colors, paint the stencils in layers instead of putting more paint on at once. Let the entire design dry completely.

Remove the masking tape and slowly peel off the stencil. Check again to make sure the paint is dry. If not, let it sit for a few more hours. If it is, it's ready to wear!

Tips

- Transfer paper meant for light-colored fabrics provide the most vintage-like images and can also used on medium-colored fabric as long as the image is high-contrast.

- Turn the iron-on tee shirt inside out before washing. Use cold water.

- If the iron-on image starts to peel a little it adds to the vintage look.

- Use only one or two colors when stenciling. This makes the design bolder.

Warning

- Do not keep unused transfer paper for more than six months. Keep it in a plastic bag and store it away from places that are too dry or humid.

Monday 6 May 2013

How Can I Make My Eyes Completely Black?

Pitch black eyes can create the spooky, possessed look you need to complete your Halloween costume or theatrical performance. This look is achieved through the use of novelty lenses that cover the eye with an opaque black color. You may choose the traditional lens style that just covers the cornea, or colored part of your eye, or you may opt for the more dramatic option called "sclera" lenses that cover the whites of your eyes and your pupils for a complete blacked-out effect. Does this Spark an idea?

Visit your dermatologist for a full eye inspection. Even if you don't require vision correction, you will still require a prescription for your novelty lenses and you will need to undergo a professional fitting for contacts.

Ask your optometrist about black sclera lenses. Your doctor should be able to recommend a number of reputable brands and options that offer special effects, "crazy" or novelty-style lenses.

Order the lenses from your optometrist. Your optometrist will invite you back to the office for a full fitting once the lenses have arrived.

Follow the manufacturer's directions for use. You may need to soak or rinse the lenses in contact solution before wear. Wash your hands with soap and warm water before handling the lenses.

Warning

- Never purchase contact lenses through a private retailer unless your doctor has recommended them. The FDA warns that "cosmetic and novelty lenses pose a greater risk of corneal ulceration than prescription lenses because they are not fitted to each person by a qualified eye care professional. Moreover, many such lenses are not prepared and stored in a sterile fashion, which increases the risk of infection."

- Novelty lenses are typically designed for limited wear. Check the manufacturer's instructions.

- If you experience any pain, itching or discomfort, remove the lenses and contact your eye care professional.

How to Relieve Tired Looking Eyes

If you have been up late studying, partying or working, traces of the lack of sleep will be evident in your eyes. Tired eyes look puffy, with prominent dark under-eye circles. The under-eye area also might feel swollen and tender, with eyes feeling dry and itchy. Relieve these tired-eye symptoms using home remedies and store-bought products. Does this Spark an idea?

Soothe Puffy Eyes

Drink 8 oz. of water. This will restore hydration and decrease fluid retention.

Place two cold spoons, a frozen gel eye mask or a bag of frozen peas over your eyes.

Lie down and place two pillows underneath your head. This will elevate your head and help decrease fluid retention in the face.

After 10 minutes remove the cold spoons, eye mask or frozen peas.

Cut two thin cucumber slices.

Place sliced cucumbers over your eyes and lie down with your head elevated. Stay in this position until pressure in under-eye area subsides.

Apply an under-eye cream designed to make the eyes less puffy. Examples of these products include Origin GinZing Refreshing Eye Cream, Freeze 24/7 Eyecing Fatigue-Fighting Eye Cream and Daily Essential De-Puffing Eye Cream.

Diminish Dark Circles

Soak cotton balls in witch hazel.

Apply cotton balls to eyes.

Lay down with head elevated and cotton balls on eyes for 10 minutes.

Remove cotton balls.

Cut two thin slices of potato.

Place slices of potato over eyes.

Lie down with head elevated and slices on eyes for 10 minutes.

Apply an under-eye cream designed to brighten area and reduce dark circles. Examples of these products include Garnier Brightening Eye Roll-on, Elizabeth Arden Ceramide Defining Eye Brightening Cream, Benefit Ooh la Lift Eye Brightener, Booster, De-puffer and Belli Motherhood Eye Brightening Cream.

Tips

- If your puffy eyes are a result of allergies, taking an antihistamine will help eliminate tired-eye symptoms.

- Rubbing your eyes will only intensify tired-eye symptoms. If you feel the need to rub or itch your eyes, place a cold compress or cool, wet washcloth over the eyes instead.

Sunday 5 May 2013

How to Use Eyeliner to Make the Eyes Appear Bigger

Eyes truly are the "windows of the soul", and while they don't have to be a certain size or shape to be beautiful, large eyes have long been a sought after feature for women all over the world. If you've always loved the look of large eyes, there are some makeup tricks you can use to make your eyes appear bigger than they actually are. Does this Spark an idea?

White Eyeliner Pencil

Apply shadow to the eyelids as normal. You can use any colors you like; but keep in mind, the lighter the colors you use, the better this trick works.

Line the bottom waterline of your eyes with a white eyeliner pencil. The waterline is the area around the inside of the eye. By lining the bottom waterline with white, it makes the whites of your eyes appear larger and brighter, enlarging and enhancing your eyes.

Brush a light coat of dark brown or black mascara onto your eyelashes. This makes the eyeliner stand out even more and helps finish off your look.

Black Eyeliner Pencil

Apply shadow to the eyelids. Again, you can use any color you want; but the lighter the colors you use, the better this makeup trick works.

Line the top of your eyes with a black eyeliner pencil. Start at the inner corner of the eye and line all the way around to the outer corner, following as closely to the lash line as possible. At the very outer corner, draw a small flick of eyeliner upwards on an angle and fill in the gap between the flick line and the line along your eye. It should almost make a triangle shape. This will appear to elongate and open your eyes.

Brush a light coat of dark brown or black mascara onto your eyelashes. This makes the eyeliner stand out even more and helps finish off your look.

Tips

- When working with eyeliner, it is always best to build the thickness of the liner up slowly, as it is easier to add more but hard to remove liner after it is already there, without ruining the rest of your eye makeup.

How to Make Your Eye Crease Look Higher

Manipulate the location of your eye crease, or at least the appearance of it, with makeup. Regardless of your eye shape or color, you can get a wider eye look with the proper makeup application rather than expensive surgery. Learn how to raise your eye crease with professional makeup brushes and some practice. Does this Spark an idea?

Shape and pluck the eyebrow, creating a slight arch at the center of the eye. This makes the eye look wider.

Apply a firming eye cream to the clean, moisturized skin around the eye. Dab the eye cream on the inner left corner of the eye, above the eyebrow, down the outer side of the eye and just underneath it. Rub the eye cream into the skin. This will make the skin taut and give it a temporary lift.

Rub eye primer on the eyelid. This will hold the eye makeup in place when you apply the eyeshadow.

Brush the eyebrows upward and outward with an eyebrow brush.

Apply the midtone eyeshadow to the bottom eyelid using a clean sponge applicator.

Feel the brow bone with your index finger. It will be helpful knowing where the bone is when you apply the accent or dark, eye crease shadow.

Dab the accent powder on to tip of the eye shadow brush. Pull your eye skin up gently.

Use your right hand to brush the accent color into the upper side of the crease. This will put the powder slightly above the natural eye crease.

Select an eyebrow brush with a long soft tip. Rub the tip across the lightest colored eyeshadow. Stroke on the lightest eyeshadow underneath the brow bone to the top of the accent color. Swirl and blend the colors together slightly using the highlighter brush.

Warning

- Avoid using frosted accent eyeshadows with this look. Matte eyeshadows are better for creating depth.

How to Apply Eye Shadow to Make Eyes Look Bigger


Your eyes can be made to look bigger and more defined through correctly applying eye shadow. Accentuate your eyes with these tips from a professional makeup artist in this free video.

Video Transcript

I'm Sarah, professional makeup artist and licensed aesthetician, and I'm going to show you how to apply eyeshadow to make the eyes look bigger. What you want to keep in mind when you're trying to make the eyes look bigger is you want to stick to lighter, brighter colors. Anything dark is really going to contour the eye, and make it look closed or smaller. So, we're going to start off using this round tip flat brush with a nice, light, ivory highlighter. And, we are going to go from the inside all the way to the outside on the brow bone. We really want to bring attention towards the outer brow bone, so that way, there's a large area for us to look at. It brings the attention not just to the eye, but what's above it, and what's next to it. We'll bring it all the way out. So, then, what we'll do is move on to another brighter color in the same kind of family. I'm going to use this nice, pretty canary yellow, and put that on my angled brush. And, I'm going to put that on the inside of her eye, and almost all the way across. The light colors, the lighter you keep it, the bigger and brighter it'll look. So, after this, I'm going to move on to a nice , pretty, bright, almost pumpkiny orange. And, I'm going to get that on the other side of her lash line, almost over there. So, now what I'm going to do, is go and add a nice pretty, this is another, shimmer makes the eyes look bigger, too. I'm going to put this right in the crease to darken both of those up, and bring that to the outside. This is, this color is not too dark to go in the crease, but dark enough to be noticeable and blend nicely with the other ones. So, now I'm going to blend all those together, using my blending brush. And, I'm just going to make small circles, make sure that these two are blending nice together, and blended all the way out. Now, there's a lot of area to look at for her eye. It's not just her eyelid, but also above it and next to it. And, that's how to make the eyes look bigger. For more tips and tricks, you can check out GlowbySarah.com.

Saturday 4 May 2013

How to Make My Uggs Look New

Named "Brand of the Year" by Footwear News in 2003, Ugg's Australian sheepskin boots have become the must-have fashion accessory of the young and trendy. The company was started in 1978, when young Australian surfer Brian Smith traveled to California to pursue his beloved surfing, while selling a backpack full of sheepskin boots to make ends meet. Ugg uses twin-face sheepskin in its products, which is generally light in color. Uggs can soon start to look worn and dirty if they are not cared for well. Uggs are expensive, purchase an Ugg's own-brand Care Kit to keep them looking good. Alternatively, you can use a gentle detergent such as baby shampoo or Woolite to clean them.

Fill a spray bottle with cold water and dampen the exteriors of your Uggs.

Dilute your liquid soap in a cup of warm water. For best results, use a non-enzyme soap.

Dip your toothbrush into the solution and gently brush the interiors and exteriors of your boots.

Dampen your sponge with warm water and rub over the boots, removing any detergent.

Scrunch up some paper towels and stuff your Uggs to keep their shape. Let them dry naturally in a dark place.

Fluff the wool on the interiors of the boots with a small natural bristle brush, when completely dry.

Tips

- Before wearing new Uggs treat them with a stain preventer to help them stop absorbing dirt and stains.

Warning

- Use proprietary sheepskin cleaners or non-enzyme liquid soaps.

How to Meet Professional Men

The three most important factors in finding your perfect match are a lot like the three most important factors in finding your perfect house: location, location, location, according to the book, "Become Your Own Matchmaker." To meet professional men, you need to be in the presence of professional men. Once you are in the presence of professional men, you need to show signs that you are interested in meeting them. Does this Spark an idea?

Look the part. If you want to catch the eye of a professional man, you need to look like the kind of woman the man would not mind having on his arm. Professionals do a lot of networking, and the odds are that if you are with him, you will influence the reputation that colleagues and potential business contacts have of him. Therefore, you not only need to be attractive to him, but also to dress in a manner that would make him proud to show you off to colleagues and business contacts.

Go to where the professional men are. Once you have on presentable attire, frequent the places where professional men congregate. Go to a sit-down restaurant during lunchtime near that big corporation in your town. Go to happy hour just after work at an upscale restaurant. Do volunteer work. Join professional organizations. Take up golf, tennis or wine tasting as a hobby. You are bound to meet professional men in these settings.

Make eye contact. If you are in the presence of professional men, find one that you like and make eye contact. If you are alone, the man is much more likely to respond than if you are with a group of your girlfriends.

Smile. Because you are a complete stranger to this man, he may need some encouragement. Smiling signals to him that it is OK for him to approach you.

Make small talk. If he approaches you, introduce yourself, and make small talk by asking him about his profession. Men love talking about themselves, and because you are specifically looking for a professional man, you want to make sure that he's the real deal. Depending on how the conversation goes, he may ask for your card or even ask you out.

Warning

- If a man does not approach you, he may have a reason, such as being attached or not being interested.

How to Determine the Weight of Jewelry Without a Scale

If you want to find out how much a piece of jewelry is worth, the weight is a good indicator. One of the methods used to value jewelry is weight. If you don't have a set of jewelry scales, you can determine the weight by using a simple calculation involving the volume and density of the jewelry. Each metal has its own density, and once you know this you can easily determine the weight of your jewelry and have a better idea of its worth. Does this Spark an idea?

Look up the density of the metal in the jewelry you wish to weigh. You can find the density of metals on sites such as the Israel Science and Technology Homepage. A lot of jewelry is gold, which has a density of 19.32 grams per cubic centimeter.

Measure the dimensions of the jewelry to find its volume if it has a regular geometric shape. If it does not you can find the volume by displacement. You do this by filling a measuring cup with water and making a note of the volume. Then place the jewelry in the cup and see what the volume is. The difference between the two measurements will give you the volume of the jewelry.

Multiply the volume by the density. This will give you the weight of the jewelry.

Friday 3 May 2013

Must-Have Accessories for Men

It's easy to get stuck in a wardrobe rut, donning the same well-worn pairs of jeans, tees and work attire day after day. This is especially the case for men, who may not always be aware of the different looks out there and who generally have fewer options than women when it comes to switching up their closet staples. Fortunately, all it takes is a few stylish accessories to upgrade your sartorial repertoire and keep you well-dressed for a variety of occasions. Stock up on fashionable, practical pieces that will give your outfits the stylistic boost they need. Does this Spark an idea?

A Stylish Timepiece

A stylish timepiece is an essential men's accessory that can both upgrade an outfit and express your personal style. Ideally, you'll have more than one so you don't have to whip out your investment watch for outdoors activities nor your waterproof sport watch at a work meeting. However, if you only choose one watch, be sure it's a versatile style that you can wear at a range of events. And since this must-have will likely be worn just about every day, opt for the best-quality piece you can afford to avoid schlepping back to the store for a new watch every year.

Suit-Worthy Ties

A few quality, versatile ties are must-haves in any man's wardrobe for work settings and other occasions when a suit is mandatory. Those who frequently suit up should upgrade their wardrobe with at least one new, wearable yet fashionable tie each year. Eventually, you should have a wide variety of ties in different shades and widths that work for every season and major occasion, from job interviews and work meetings to weddings.

Belts

Belts are the perfect example of a men's must-have accessory, fulfilling its practical side by holding up pants while enhancing an ensemble. It's important to color-coordinate leather belts with your shoes, especially for work or other formal occasions, so you'll want at least a few belts to go with your various footwear. For casual outfits, opt for less conservative belts in different materials such as canvas or with detailing such as stripes, braiding or metal grommets.

Leather Wallet

If you don't already have one, invest in a quality black or brown leather wallet that fits easily into a pants or coat pocket. This classic money-holder is a must-have accessory for men of all ages, providing timeless style on top of practicality. Choose a flat leather billfold with a change pocket that you can carry wherever you go instead of digging into your pockets.

How to Make a Wide Nose Look Smaller

A wide nose often detracts from the appeal of your face, drawing attention away from your eyes, mouth and neckline. Surgical operations are available to make your nose permanently smaller. However, these operations are invasive and expensive. According to Robert Jones, author of "Makeup Makeovers," with proper use of makeup, you can make your wide nose appear slender for a fraction of the cost of plastic surgery. After you have mastered the technique, applying the makeup to slenderize your nose will only take a minute. Does this Spark an idea?

Choose a highlight and low light shade of facial makeup that complements your skin tone. According to Kit Spencer, author of "Pro Makeup," the low light should be one shade darker than your inherent facial skin tone while the highlight should be one shade lighter.

Wash your face with warm water to remove any built-up oils that would interfere with makeup application.

Use your index finger to apply the low light facial makeup to the sides of your nose. Do not apply the makeup to your nostrils, the top of your nose or onto your cheeks. Gradually lighten it around the edges so it blends with your natural skin tone. This makeup should appear no darker than a light shadow.

Wash the makeup from your finger with warm water and dry your hand with a clean towel.

Apply the highlight facial makeup with your index finger along the top of your nose. Rub your finger in small, circular motions over the line where the highlight meets the low light to blend. The highlight on the top of your nose with shading along the sides will make it appear thinner.

Tips

- If the makeup you have chosen is too dark or too light and noticeably stands out, it might prove difficult to blend. Purchase a shade closer to your natural skin tone.